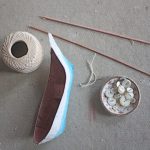
download pattern here
large cereal box
scissors
scotch tape
ruler
exacto knife
newspaper- 2 colors
wall paper paste
paint brushes
paint
skewers. dowels or twigs
string
heavy duty thread
needles – various sizes
fabric
buttons
glue
1.get the cardboard box and cut it out on the dotted line – the solid lines are for scoring - there are little triangles on one end – you can fold those back to trace the line onto your cardboard and poke your pencil through the tip of the V on the pattern to mark your cardboard.
2.Use a ruler to draw the lines as shown on the pattern. I’ve highlighted the lines to score in red. Use the BACK of your exacto knife to score the lines in red and then gently bend the boat into shape……
3.Bring the edges together and secure with lots of scotch tape – they shouldn’t overlap but just meet and last tape the front tips together.
4.Trim any excess so the back edge is smooth and now you should have a little boat shape. Cut a strip of cardboard that’s about 1 ” by 3″.
5.Bend that strip into a little triangle shape that fits inside your boat and tape it in , just a little closer to the front (bow ) than the back (stern), this will hold your mast. You’re ready to paper mache – I recommend 2 layers using different papers – so you can see when a layer is complete. You don’t have to let the boat dry between layers but I like to. I start with the inside of the boat closing up the little triangle space – you don’t have to fill it – just close it up.
5.Notes on paper mache – I find it easiest to do the edges first and the smaller the pieces of paper the smoother and stronger the finished result. I use golden harvest wheat paste. Add your second layer of paper, let it dry completely then paint it. I used a mixture of latex and water color.
6. Now you’re ready for the mast and yard ( part that attaches to the sail) . There are a number of things you can use – dowels , skewers, twigs – today I’m using a bamboo skewer for the mast and an 1/8 inch dowel for the yard. I have painted both. Poke a little hole with your exacto knife and insert your mast ( insert the pointy end of the skewer), secure it with glue and trim the top to the desired length – this will depend on the size of your boat ( if you have made the pattern larger or smaller) – my mast is 9 inches tall and my yard is 12 inches long. Use your exacto knife to cut a little notch in your mast about an inch and 1/2 from the top.
 7. The notch will help the button you’re going to tie on stay in place. Tie the button as tightly as you can with your string and secure with a dab of glue. Place the boat on a large piece of paper and lay the yard in place – we’re going to make the pattern for the sail. Hold the yard in place but slide the boat out and draw a triangle shape for your sail.

8.
 I like to make a note on the pattern to remind me which side the mast goes on. Cut out your sail. embellish as desired and use a heavy duty thread to sew it to the yard.
9. Poke holes in the boat for attaching buttons for the rigging. This is a pain in the ass and you need to use something very sharp, I used a really big embroidery needle. You can use as many buttons as you like. I like to have lots of rigging options so I used 4. Once the buttons are on lay the sail on the mast and find the best spot to attach.
Add a length of about 4 inches to the sail where you would like it to attach to the mast and just wind the string around the button on the mast. Attach several inches of string to the bottom corners of the sail and wind those around the buttons on the boat. Tie a loop of string the the mast for hanging, secure it with glue and tie an extra piece of string around to make sure it stays there.


